By now, your child has likely already determined which sweet message will be on their Valentine cards to their classmates and friends. You’ve probably already picked up the individually wrapped, allergen-free, kid-approved treat, sticker, or toy that will be accompanying those cards. You’ve lined them up and packaged them just as the teachers have asked you to do. And no doubt, you deserve a medal for it!
But what about your child’s extra special Valentine? The one for their grandparents, their cousins, or the babysitter? How do you show a little extra care… with what you’ve got already there?
Wonder Bunch has you covered! With a few items you probably already have on hand, your little sweetheart can say I love you to those who mean the most.
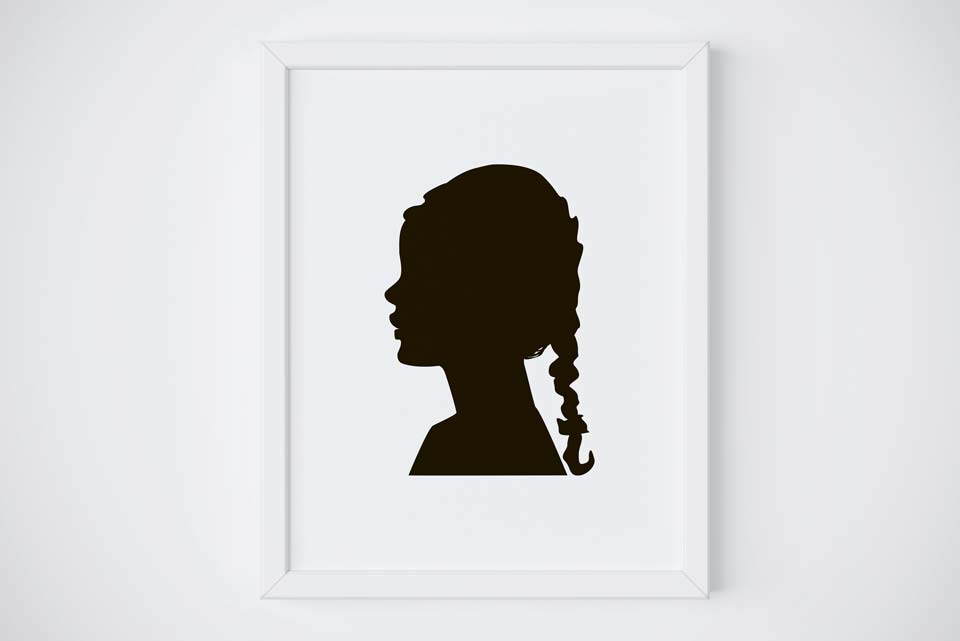
DIY Silhouette
These make excellent gifts, ornaments, or keepsakes for anyone who loves watching your child grow!
You’ll Need:
Black and white paper (can be fancy, construction or printer paper)
A pencil
Scissors
Glue stick
A phone camera
A laptop, desktop or tablet
A picture frame
Take Photo: Take a side profile photo (using your phone is just fine!) of the child against a white wall. Add even more detail to the silhouette with a ponytail or by messing the child’s hair up a bit. You may need to take a few photos to experiment with how clear their facial details are. Have them smile and look straight on and then also ever so slightly towards you, just in case their cheeks are so big and adorable that you maybe lose the details of their nose and mouth.
Upload Photo: Next, upload the photos to your computer and import them into an editing program (iPhoto, Photoshop, etc.). Adjust the size to match whatever will fit in your picture frame. The bigger the screen you’re working on, the bigger you can make your silhouette.
Edit and Add Contrast: This step is not necessary, but it does make things easier. Adjusting the contrast and sharpness can help make the profile more defined.
Tape Paper to Screen and Trace: Tape a piece of thin white paper (the thinner the better) to your screen and using a thin pencil, gently trace the profile. It’s so important to be sure you get those details! Hair wisps, lashes, cheeks, and lips. Be sure to capture, and maybe even exaggerate, every feature.
Cut it Out: Paste the thin white paper on a piece of thicker black paper and start cutting! Have fun and pay attention to those details you traced. Once you’ve cut along all of your tracing lines, flip it over and you will have a clean, black silhouette.
Final Details: Glue your sweet silhouette to whatever color of background you want! Make it pop against a white background, or let the kids pick their favorite construction paper to glue it to. (Consider the side you want the profile to face in the frame so you know which side to glue on.) Last, be sure to have the kids sign and date it so you can always remember this exact moment in time!
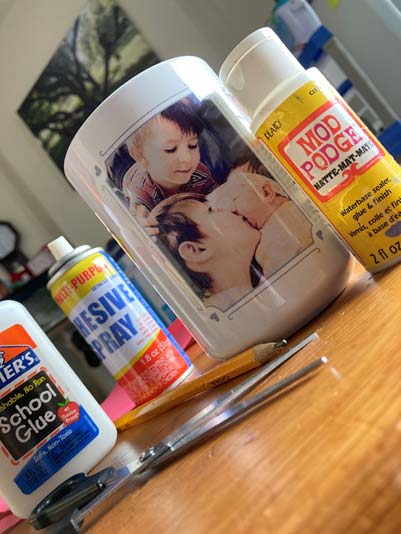
Make Your Own Mug
Do you have the perfect photo you want to gift to an aunt, parent, grandparent, or for your child to give to you to have at your desk at all times? Maybe you’re just looking for a great spot to use the previous craft and you’d love your child’s silhouette on a mug! It’s easier than you think to custom make your own mugs, plates, and canvasses!
You’ll Need:
A dynamite picture you adore
A printer
Mod Podge (for mugs, consider using the dishwasher safe version)
Sponge or sponge brush
A mug, plate, canvas, vase, pencil cup, or any other hard-surfaced item you’d like your photo on
Adjust the size of your photo to fit your gift item and print it
Generously apply Mod Podge (available at any Hobby Store, Target, or Dollar Tree) to the back of your photo with a sponge-brush
Carefully place your photo onto the surface of your gift item, and immediately smooth any bubble or wrinkles
Allow to dry slightly before applying a second coat of Mod Podge to the top of the photo. Do not oversaturate or your picture or it will bleed and run
Allow to dry completely and polish gently to remove brush marks before gifting.
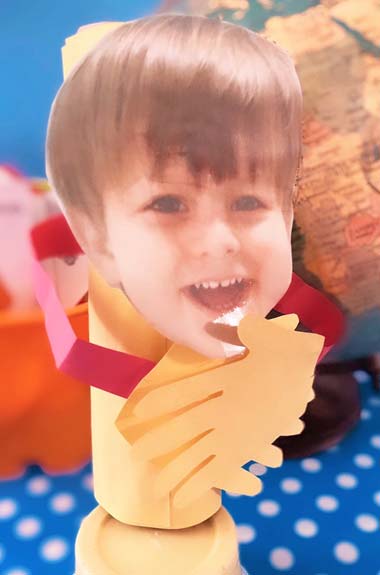
Send a Hug
Your child’s grandparents were already not getting as many hugs as they wanted, and this year cost them so many more. Send a silly hug monster to remind those who miss your little ones that there is nothing that we are looking forward to more than a giant monster hug!
You’ll Need:
Photo of your child’s face
Empty paper towel tube
Construction paper
Glue
Start by tracing your child’s hands on a piece of construction paper and cut them out
Cut two strips of paper, about ¼ inch thick the entire length of the construction paper, and accordion fold them
Cut your child’s face out of the photo
Glue another piece of construction paper around the paper towel tube and let your child decorate it like their favorite outfit. Add stickers, glitter, the works!
Carefully cut two slits in the side of the paper towel tube and slide one side of the accordion folded strips into each side. Tape them on the inside. These are now your monster’s arms
Glue hand cutouts to the other side of the accordion strips
Glue your child’s face in place and send your little love monster on its way to whomever needs a hug this Valentine’s day!
Pillow Upcycle
Whether it’s a grandparent missing your little one, or your little one missing them back, the answer is a retired T-shirt away.
You’ll Need:
A favorite shirt that no longer fits
Needle and thread
Cotton or fluff for stuffing
Get creative with the shape of your new pillow! Use the leg of pajama pants or cut a heart shape from a soft sweatshirt
Use a mix of baby clothes your child’s grandparent bought or loved them in, to help keep those memories closer at hand
Use a mix of fabrics and textures if possible. The sensory is excellent for brain health, and for connecting memories to touch
Sewing a pillow, bear, or cuddly toy out of the clothing of a beloved family member is just one more way we can stay close, no matter how far!
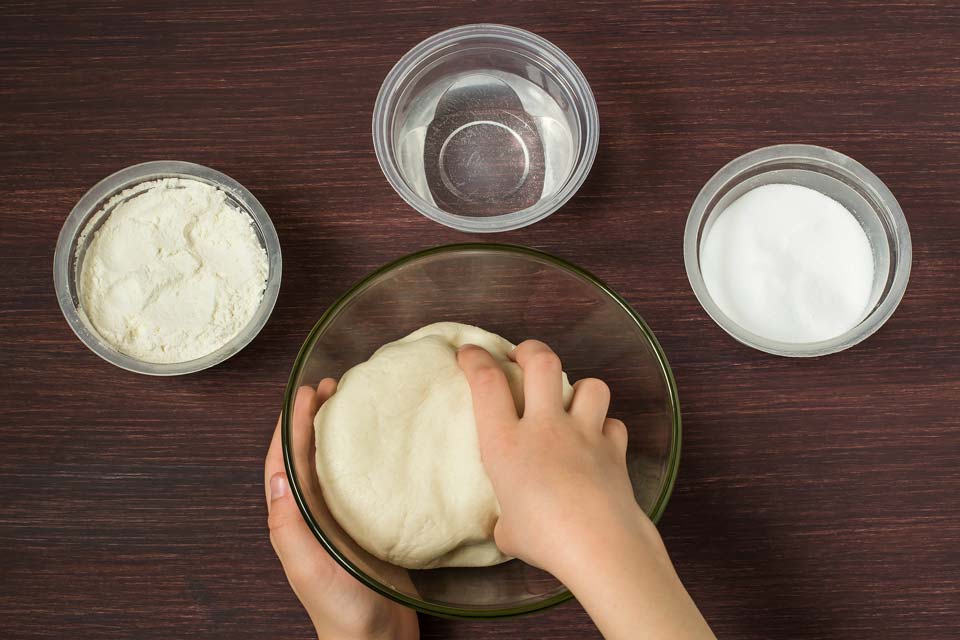
Salt Dough Hand Prints
It may seem like those little handprints are on just about everything these days, but they’re growing so fast, and you’ll miss those little baby hands soon. Keep them forever by creating a keepsake for your family, or for anyone who would love to hold your child’s hand every step of the way!
You’ll Need:
4 cups of flour
1 cup of salt
Mod Podge
Acrylic paint
Cute little baby hands
Food coloring (optional)
Combine flour and salt, then add about 1 ½ cups of water. You don’t want your mixture to be too thin or sticky, so start with just less than 1 ½ cups and continue adding as necessary.
Knead the dough until completely smooth. If your dough starts to crack, add a little more water. Add food coloring at this point if you’d like. Either one solid color or using multiple colors can create a cool marble effect.
Once the dough is smooth, roll it out to create a flat surface large enough for your child’s handprint. If the dough is too thick, it won’t dry properly, so roll it out to about ¼ inches thick.
Carefully press your child’s hand into the dough to create a clear print.
Allow to dry overnight.
Bake in a 200 degree oven for one to two hours, or until completely dry.
Paint and decorate.
Once dry, cover with a thin later of Mod Podge to preserve your masterpiece!
We love learning all the ways your family says “I love you,” and what better time of year to share the love. Be sure to tag us if you try any of these crafts. We’d love to see them.
Wonder Bunch Shares Tips and Tricks to Kid-Proof Your Life November is Child Safety Month, and Wonder Bunch Media wants you to know that we think you have been doing an incredible job keeping your...
A recent article by NPR titled “Real Parents, Real Talk About Kids And Screens” states “Screen time isn't going anywhere. So let's talk about it.” It’s the honest truth. We live in a technology-ruled age,...